 How-to
How Do You Curate a Family Photo Collection?
Last Updated: November 2, 2026
Quick Summary
To curate family photos, first take inventory of every place your pictures live, then gather them into one place. Score each photo on story, clarity, and uniqueness, keep the highest scorers, and sort what remains by date, event, and person. Then remove duplicates and store the keepers with archival care.
- Take inventory of prints, albums, phones, drives, and cloud accounts before sorting anything.
- Score each photo from 1 to 3 on story, clarity, and uniqueness, then add the scores.
- A total of 7 to 9 earns a permanent place in the curated collection.
- Keep at least two copies of your final digital collection, one on an external drive and one in cloud storage.
- Never use tape, rubber bands, or paper clips on prints, since they leave permanent residue or creases.
Table of Contents
- Start With a Clear Picture of Your Collection
- Gather Photos From Every Source
- Set a Curation Framework Before You Sort
- Sort by Date, Event, and Person
- Remove Duplicates and Unwanted Images
- How to Organize Digital Photos
- How to Choose Photos for a Family Album
- Family Photo Album Ideas and How to Display Family Photos
- Your Next Step: Book Your Free In-Home Consultation
- Frequently Asked Questions
Start With a Clear Picture of Your Collection
Curating a family photo collection starts with knowing how much you have. Once everything is counted in one place, the size of the archive becomes clear, and that count is the real first step to curate family photos with confidence.
Take inventory before you touch a single photo. Walk through closets, drawers, old phones, hard drives, and shared cloud accounts. Write down where each group of photos lives.
- Printed prints and loose snapshots
- Family albums and shoeboxes
- Phones and tablets
- Old computers and external drives
- Shared cloud accounts and social media
This first step gives you a clear starting point. You will know what you are working with and how much time the project will take.
Gather Photos From Every Source
Once you know where your photos live, bring them together. A curated collection is only as complete as the photos you pull into it.
Start with the easiest sources. Move photos from your phone and computer into one main folder. Then tackle the harder ones, like loose prints and older media.
- Download photos from cloud accounts and social media
- Ask relatives to share photos they have saved
- Collect prints from albums and envelopes
- Copy files from old drives before they fail
Gathering from family members often turns up images you never knew existed. Keep a list of who sent what, so you can credit the source later.
Set a Curation Framework Before You Sort
Sorting goes faster when you decide what matters first. Without a framework, every photo becomes a hard choice, and hard choices stall projects. Writing the rules down before opening the first box keeps a collection project moving.
Build a simple scoring system. Give every photo a score from 1 to 3 on three questions, then add the scores.
- Story: Does this image mark a moment your family talks about, a turning point, or a person who shaped the family? Score 3 for a defining moment, 2 for a pleasant but ordinary one, 1 for a filler shot.
- Clarity: Can you see faces, and is the image sharp enough to print at 5 by 7 inches or larger? Score 3 for print-ready, 2 for screen-only, 1 for damaged beyond use.
- Uniqueness: Does it show something no other photo in the pile shows, such as a place, an outfit, or a person at an age you have no other record of? Score 3 for one of a kind, 2 for a variation, 1 for a near-duplicate.
A total of 7 to 9 earns a permanent place in the curated collection. A 5 or 6 goes into a review pile you revisit once, then decide. A 3 or 4 is a candidate to release. This keeps you from debating each photo from scratch.
Set a target ratio before you start. Decide in advance how many printed snapshots and how many digital frames from a burst you will keep. Write your ratio on a sticky note and hold to it. The number matters less than the consistency.
Watch out for two traps. The first is sentiment creep, where every photo feels too precious to release. The second is the opposite, where one decisive family member cuts too hard and later regrets it. Solve both by agreeing on the framework together before you start cutting, and by routing borderline photos to the review pile rather than the trash. A second pass two weeks later is calmer and more accurate than a decision made in the moment. Establishing this collaborative rhythm ensures that the final selection remains meaningful as you organize photos for books.
If family members disagree about what to keep, the framework is your referee. Point to the score, not the person. That keeps the conversation about the collection instead of about each other.
Sort by Date, Event, and Person
Sorting gives your collection structure. Most families find that date, event, and person work best as the main categories when they curate family photos into a clear, searchable archive.
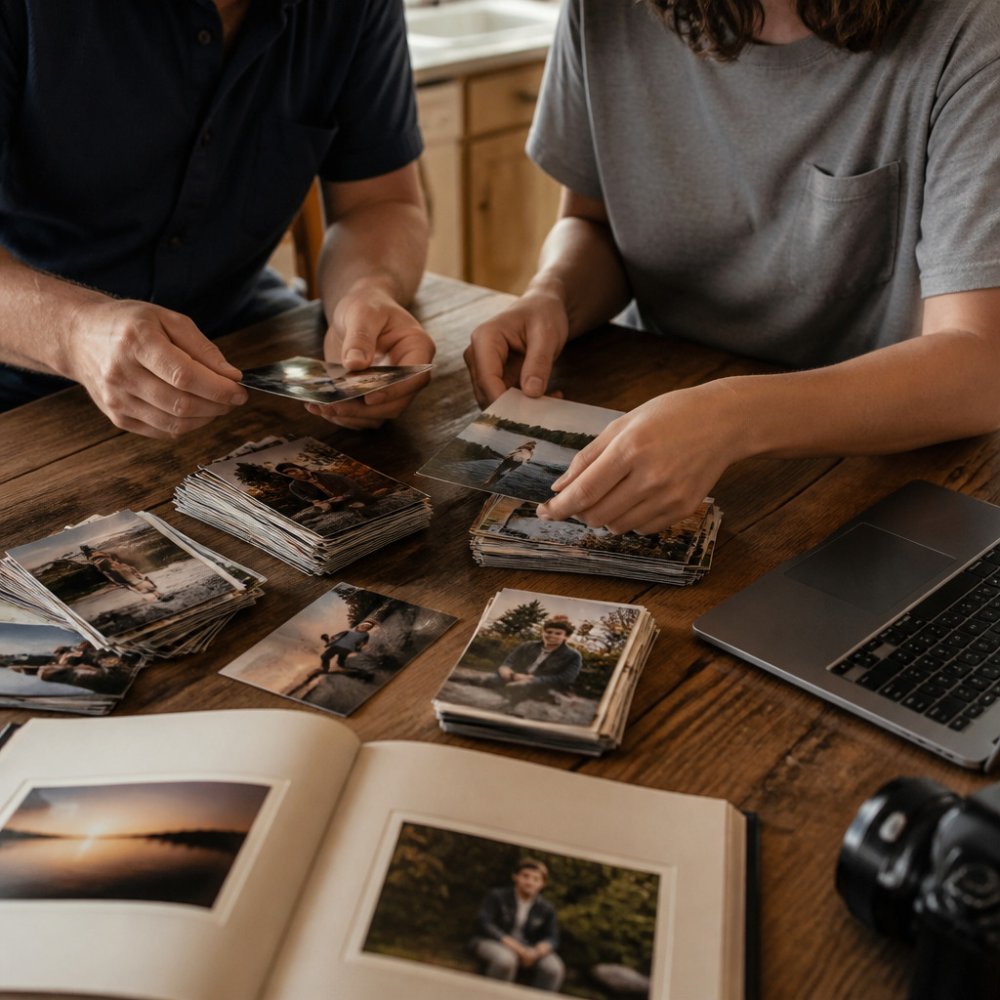
Sort by date first when you have a rough timeline. If you want to know what to expect from a professional session, including how proofs and files are handled, read Everything You Need to Know About A Photography Session. Then group by event, such as a holiday, trip, or milestone. Use person-based folders for relatives or stages of life.
A parent and high school senior sitting side by side at a wooden kitchen table, sorting printed photographs into labeled piles while a laptop sits open nearby.
Add a short note to each folder with the approximate date, place, and names. These details make the collection far more useful years from now.
Remove Duplicates and Unwanted Images
Duplicates and blurry shots fill space and hide the photos worth keeping. Removing them is the most satisfying part of the process, and it is also where careless handling does the most damage to the prints you decide to keep.
Start with exact duplicates. Many photo apps and computers can flag them automatically. Then review near-duplicates, such as burst shots taken seconds apart, and keep the sharpest version. For prints, hold duplicates up to a window in daylight and keep the one with the least fading, scratching, and edge wear.
- Delete exact copies first
- Keep the best frame from burst sequences
- Remove blurry or accidental shots
- Release images that no longer matter to your family
- Set aside damaged prints that still carry information, such as a date or a name on the back
Be firm but kind with yourself. You are not throwing away memories. You are making room for the ones that count.
Handle the Keepers Like Archives
The prints you keep deserve better than a shoebox. Paper, adhesive, and light are the three things that destroy photographs fastest, and each has a simple defense.
- Touch prints by the edges only, or wear clean cotton gloves. Oils from fingers etch into emulsion over time.
- Skip magnetic albums and self-adhesive pages, since their adhesive can bond to a print over time.
- Store prints flat in archival boxes made of acid-free board. Avoid attics, garages, and basements, where heat and moisture swing widely.
- Keep prints out of direct sun. Ultraviolet light fades color faster than any other single factor.
- Never write on the front of a print. If you must label a print, write lightly on the back along the edge.
Back Up the Digital Keepers
Once duplicates are gone, protect what remains. Keep at least two copies of your final digital collection. Store one on an external drive and one in cloud storage, and check both every year by opening a few random files.
Your cleaned-up collection should be easy to find, share, and print when the time comes.
The table below summarizes the core steps for removing duplicates and handling the prints you keep.
| Task | Method | Key detail |
|---|---|---|
| Exact duplicates | Delete first | Photo apps can flag them automatically |
| Burst sequences | Keep the sharpest frame | Shots taken seconds apart |
| Print duplicates | Hold to a window in daylight | Keep the least faded, scratched, or worn copy |
| Handling prints | Touch by edges or wear gloves | Oils from fingers etch emulsion over time |
| Storage | Flat in acid-free archival boxes | Avoid attics, garages, and basements |
| Light | Keep out of direct sun | Ultraviolet light fades color fastest |
| Digital backup | Keep at least two copies | One external drive and one cloud copy |
How to Organize Digital Photos
Digital photos need a clear folder structure to stay useful. A consistent system keeps your collection easy to browse for years.
Create a main folder for each year, then subfolders for events. Use a simple naming pattern, such as "2027 - Senior Portraits - Lake Conroe." Consistent names make search far faster.
Keep at least two copies of your final collection. Store one on an external drive and one in cloud storage. Check your backups every year.
Your organized digital photos should be easy to find, share, and print when the time comes.
How to Choose Photos for a Family Album
A family album tells a story from start to finish. The best albums feel edited, not crowded.
Choose a clear theme first, such as one person's childhood or one year of life. Then pick a small set of strong images, often 20 to 40 photos for a standard album.
- Select photos with good light and clear faces
- Include a mix of close-ups and wider scenes
- Balance candid moments with posed portraits
- Leave out near-duplicates
Print a test layout before committing. Seeing photos side by side reveals which images belong and which should be replaced.
Family Photo Album Ideas and How to Display Family Photos
Once your collection is curated, you can share it in many ways. Physical displays turn the archive into something the whole family sees every day.
Popular options include:
- A coffee-table album for guests to browse
- A gallery wall with frames in one style
- A rotating digital frame in the hallway
- A timeline album covering several years
- A heirloom album for future generations
When you display family photos, group them by theme or era. Rotate images every few months so the display stays fresh.
Museum-quality heirloom prints, albums, and wall art from Swartz Portraits are handcrafted in Italy by GraphiStudio.
Your Next Step: Book Your Free In-Home Consultation
A curated collection is worth preserving with care. If you are planning high school senior portraits, Swartz Portraits can help you turn your favorite images into lasting heirlooms.
Master Photographer Ty Swartz offers a complimentary 60-minute in-home consultation. It is a relaxed way to talk through your goals, your senior's style, and the locations you have in mind. Only 100 seniors are photographed each year, with no more than 8 from any single high school, so availability is limited.
Schedule your free in-home consultation.
Frequently Asked Questions
How do you start curating a family photo collection?
Start by estimating how many photos you have and where they live: phone, computer, cloud accounts, drawers, and albums. Then gather everything into one place before you decide anything. A clear inventory keeps the process from feeling endless. Set a short first session, such as one hour, and choose one source to begin with. Most families find that working through a single shoebox or phone library builds momentum for the rest of the collection.
How do you choose which family photos to keep?
Ask what each photo shows that matters: a person, a milestone, a place, or a moment that tells a story. Keep the strongest image from a burst of similar shots, and remove blurred or near-identical copies. Decide with other family members when preferences differ, since a grandparent may value a photo a teenager would discard. Write one or two criteria before you begin so every decision follows the same logic.
How do you organize digital family photos?
Create a folder structure by year, then by event or family member, and name files with the date and a short description. Store the collection in at least two places, such as an external drive and a cloud service. Keep captions in the file name or in the photo's metadata so names and dates survive when files move. Review the library once or twice a year to add new images and remove duplicates that have appeared since the last review.