 how-to
How Do You Protect Printed Photos From Fading?
Last Updated: October 30, 2026
Quick Summary
To protect photo prints, keep them out of direct sunlight, since ultraviolet light breaks down the dyes and pigments that form the image. Keep them in a stable, moderate temperature and humidity, and use archival materials such as acid-free sleeves, mats, and UV-filtering glazing. Rotate displayed prints out of bright spots every six to twelve months.
- Ultraviolet light does the most damage, and the harm adds up with every hour of exposure.
- Watch the wall at 9 a.m., noon, 3 p.m., and 6 p.m. to find spots that receive direct sun.
- Use UV-filtering glass or acrylic on any print that hangs in a room with windows.
- Choose acid-free, lignin-free, and PAT-approved supplies, and avoid tape, rubber cement, and regular glue.
- Move displayed prints out of bright spots every six to twelve months and let them rest in shade.
Table of Contents
- Why Printed Photos Fade and What Speeds It Up
- Step 1: Control the Light Your Prints Receive
- Step 2: Manage Temperature and Humidity
- Step 3: Choose Archival Materials for Every Print
- Step 4: Store Prints Flat, Upright, and Protected
- Step 5: Display Prints Without Losing Their Color
- Common Mistakes That Speed Up Fading
- Maintenance: Checking Your Prints Over Time
- Preserving Your Senior Portraits for Generations
- Frequently Asked Questions
Why Printed Photos Fade and What Speeds It Up
Printed photos fade mostly because of light, heat, humidity, and the materials they touch. Each one works slowly, and together they can wash out a portrait in a few years. Protecting photo prints starts with knowing what does the damage.
Light is the biggest threat. Ultraviolet rays break down the dyes and pigments in a print, and the damage builds with every hour of exposure. Heat speeds up that breakdown. Humidity can cause prints to stick together, warp, or grow mold. Acidic paper, cheap plastic sleeves, and adhesive tape add their own slow harm.
The good news is that you control most of these factors. The steps below show how to reduce each one, starting with light, which does the most damage.
Step 1: Control the Light Your Prints Receive
Direct sunlight is the fastest way to fade a print. Keep prints out of any spot where sun falls on them, even for a few hours a day. A window that gets afternoon sun can do more harm in a single season than a shaded wall does over many years.
The mechanism is cumulative. Ultraviolet and visible light break the chemical bonds in the dyes and pigments that form the image, and the damage adds up with every hour of exposure. There is no threshold below which exposure is free. There is only a slower rate of change.
Indoor light still matters. Fluorescent tubes and some LED fixtures emit small amounts of UV, and strong overhead lighting adds visible-light exposure on top of that. A soft, indirect source is the safest choice for display. The goal is not darkness. It is light that reaches the print without striking it directly for long stretches.
Read the room before you hang anything
Spend one sunny day watching the wall you have in mind. Note when direct sun lands on it and for how long. A south-facing window in the northern hemisphere throws light deepest in winter, when the sun sits low. A west-facing window delivers hard afternoon light in summer. An interior wall that shares no exterior face is the safest default for a high school senior portrait you plan to keep for decades.
A simple light audit takes an afternoon:
- Watch the wall at 9 a.m., noon, 3 p.m., and 6 p.m. on a clear day
- Mark with painter's tape any spot that receives direct sun for more than an hour
- Note fixtures within six feet that point at the wall
- Check the wall again in a different season, because sun angles shift
Choose glazing with the trade-off in mind
UV-filtering glass and acrylic block most ultraviolet light, but they do not stop visible-light fading, and they do not stop glare. Two framed portraits can sit side by side and age at different rates depending on the glazing and the angle of the light hitting them.
A few practical rules:
- UV-filtering glazing is worth it on any print that will hang in a room with windows
- Museum glass reduces reflection sharply but costs more and shows fingerprints more readily
- Standard clear glass offers no UV protection and should be reserved for prints in dim, interior rooms
- Acrylic is lighter and safer above furniture, but it scratches more easily than glass
If a portrait must hang where sun reaches it, rotate it out of that spot every six to twelve months. A print that spends half its life in shade will hold color far longer than one that never moves.
Control the light you add
Display lighting is where most households accidentally shorten a print's life. A picture light aimed straight at a framed portrait adds heat and visible-light exposure every evening. If you use one, choose a low-heat LED model, aim it at the wall above the frame rather than into the glass, and turn it off when the room is empty.
Track lighting is the better tool for a gallery wall of senior portraits. Angle each head so the beam grazes the wall at roughly 30 degrees instead of hitting the glass head-on. That angle lights the image, reduces glare, and keeps the light from pooling on one spot.
A framed portrait that looks fine from across the room can still lose color over a single sunny summer if it hangs in the wrong spot. Fading is slow enough to hide and fast enough to matter.
What to do when you cannot move the print
Some walls are the only wall. If a high school senior portrait has to hang in a bright room, stack the defenses: UV-filtering glazing, a spot out of direct sun, a picture light you actually turn off, and a yearly rotation. None of these alone is enough. Together they buy years.
For a portrait you plan to pass down, consider keeping a second print stored flat in the dark. The displayed copy takes the wear, while the stored copy stays true.
Step 2: Manage Temperature and Humidity
Heat and moisture work together to age a print. A steady, moderate environment protects color far better than a space that swings between hot and cold. Attics, garages, and basements are the worst places to store prints because they swing the most.
Aim for a stable room temperature that you would find comfortable to sit in. Avoid spots next to heating vents, radiators, or exterior walls that get cold in winter. Humidity should stay moderate. Very damp air invites mold, and very dry air can make paper brittle.
A small hygrometer, which costs little and reads humidity, helps you check the room. If you see condensation on windows or a musty smell near stored prints, move them to a drier space right away.
Step 3: Choose Archival Materials for Every Print
The materials that touch your print matter as much as the light around it. Many common sleeves, albums, and frames contain acid, lignin, or plasticizers that leach into paper over time and cause yellowing or fading.
Look for products labeled acid-free, lignin-free, and PAT-approved (Photographic Activity Test). Mounting boards, sleeves, and matting should be archival grade. Avoid self-adhesive tape, rubber cement, and regular glue, since these can stain or damage the image.
Here is a quick guide to common supplies:
| Item | Safe Choice | Avoid |
|---|---|---|
| Sleeves | Polyester or polypropylene, archival grade | Soft vinyl, PVC |
| Mats | Acid-free, lignin-free board | Standard wood-pulp board |
| Adhesive | Archival photo corners or hinges | Tape, rubber cement |
| Frame glazing | UV-filtering glass or acrylic | Clear, unfiltered glass |
A print sealed in the wrong sleeve can fade faster than one left in the open. Check the label before you buy.
Step 4: Store Prints Flat, Upright, and Protected
How you store prints affects their longevity. Flat storage works well for small batches, and prints should lie in archival folders or boxes. Stack them with interleaving sheets of acid-free tissue between each one to prevent sticking and scratching.
Upright storage suits larger sets. Use a sturdy archival box with the prints standing on their long edge, and do not pack them so tightly that they bend. Label each box clearly so you can find a specific portrait without handling the rest.
Keep storage boxes off the floor and away from exterior walls. Store them in a closet or cabinet inside the main living area when possible, where temperature and humidity stay steadier.
Step 5: Display Prints Without Losing Their Color
Displaying prints is the best way to enjoy them, and it is also where fading is most likely. You can display a portrait for years and still keep its color true by making a few smart choices about where it hangs, how it is framed, and how the light reaches it.
Choose a wall that receives indirect light and no harsh sun. Use UV-filtering glazing, and hang the print at a height where you can see it easily. Rotate displayed prints every year or two if one spot gets more light than the others.
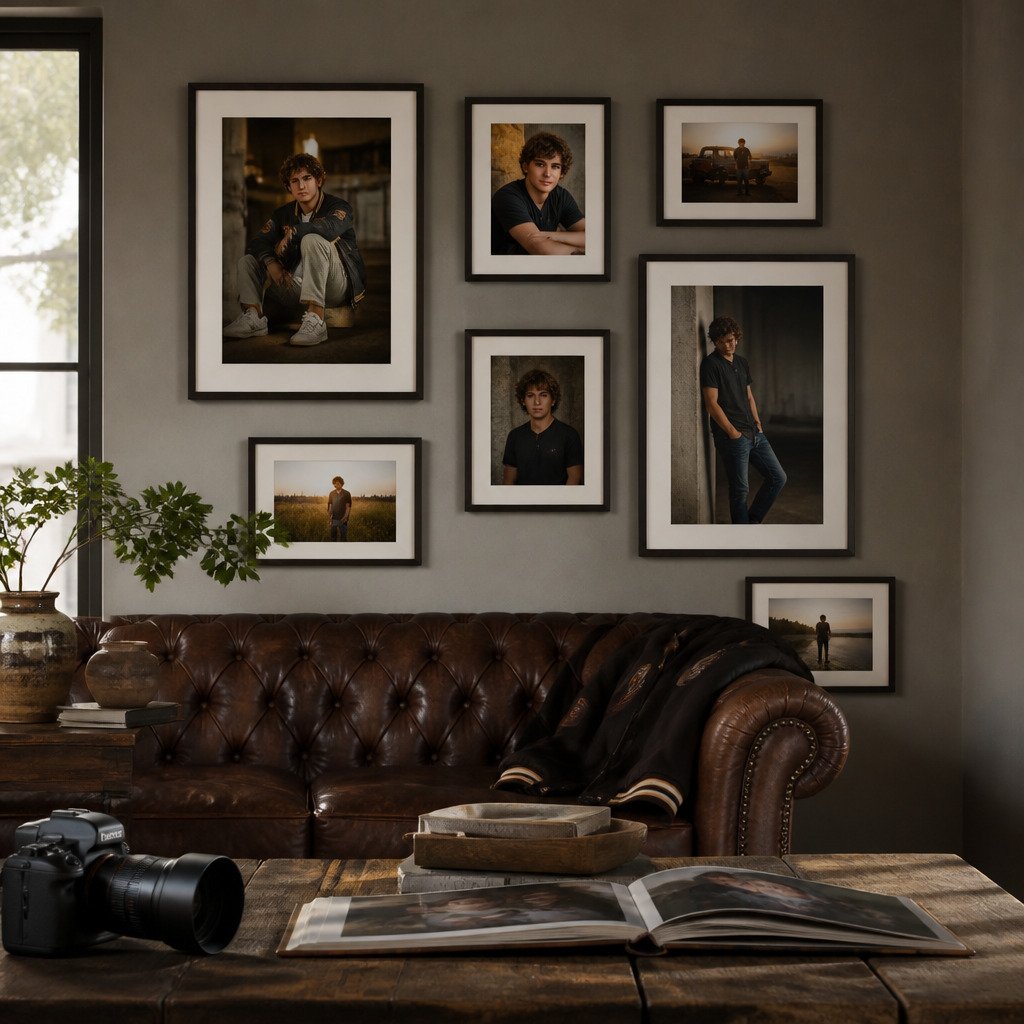
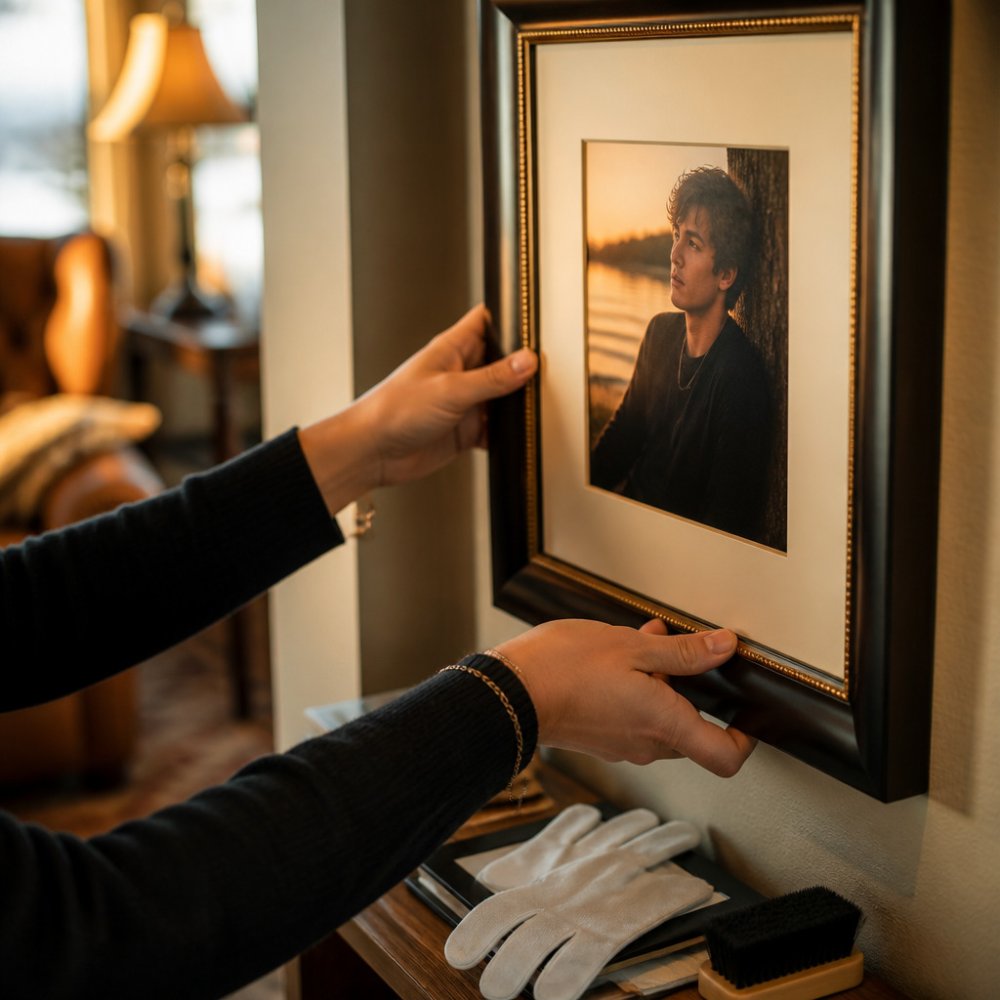
Here is a framed senior portrait hanging on a wall in a warm, softly lit living room, away from direct window light.
Hang at the right height and spacing
The single most common display mistake is hanging a portrait too high. The center of the frame should sit at roughly 57 to 60 inches from the floor, which is about eye level for most adults. A high school senior portrait hung at that height reads as a portrait. The same frame hung a foot higher reads as decoration.
Spacing matters as much as height. On a gallery wall, leave 2 to 3 inches between frames in a tight cluster and 3 to 4 inches in a looser arrangement. Consistent gaps make mixed frame sizes look intentional rather than accidental.
A few display standards worth following:
- Center the frame at 57 to 60 inches from the floor
- Keep 2 to 4 inches between frames in a cluster
- Leave at least 8 to 10 inches between the bottom of the frame and the top of furniture
- Hang larger portraits lower and smaller ones higher within a cluster
- Use a paper template taped to the wall before you drive a nail
Plan the wall before you hammer
A paper template is the cheapest tool in the room. Trace each frame onto kraft paper, cut it out, and tape the shapes to the wall. Step back. Move them. Live with the arrangement for a day before you commit.
Digital preview tools have made this faster.
Photograph the taped-up template from across the room and look at the photo on your phone. The camera flattens the wall the way a guest will see it, and problems that hide at close range show up immediately.
Choose frames for the light, not just the look
Frame style is a design decision. Frame glazing is a preservation decision. The two should be made together.
A dark wood frame with UV-filtering glass and an acid-free mat is the safest combination for a high school senior portrait in a room with windows. A thin metal frame with standard glass looks sharp but offers no UV protection. If the wall receives any direct sun, the glazing choice matters more than the frame finish.
For a collected look, mix frame finishes but keep the glazing consistent. Matching UV-filtering glass across every frame on the wall means no portrait is the weak link.
Handle glare as a design problem
Glare is the reason many framed portraits look worse on the wall than they did in the proof. Light hitting the glass at a shallow angle bounces back at the viewer and washes out the image.
A few ways to reduce it:
- Angle picture lights to graze the wall rather than hit the glass
- Choose museum glass or anti-reflective acrylic on portraits that face a window
- Hang the frame so the main light source is to the side, not directly opposite
- Avoid placing a framed portrait directly across from a bright window
Rotate and rest
A displayed print is always aging. Rotation is how you slow it. Move a portrait out of a bright spot every six to twelve months and let it rest in a shaded wall or a flat storage box. A print that spends half its life in the dark will hold color far longer than one that never moves.
Good display habits include:
- Keep displayed prints out of direct sun
- Use UV-filtering glass or acrylic on every frame
- Avoid hanging prints above radiators or fireplaces
- Check frames each season for moisture or condensation
- Rotate prints in bright spots at least once a year
For ideas on choosing a display layout, read How Do You Arrange Portraits on a Gallery Wall?. A thoughtful arrangement helps you enjoy your prints while keeping them in a safe spot.
Common Mistakes That Speed Up Fading
Most fading comes from a few avoidable habits. Knowing them helps you spot trouble before it starts.
A common mistake is storing prints in the attic or garage. These spaces swing between extreme heat and cold, which speeds up fading and can warp paper. Another is keeping prints in cheap photo albums with sticky pages. The adhesive and plastic can leave permanent marks.
Other mistakes to avoid:
- Using tape or glue to attach prints to backing boards
- Framing prints behind regular glass that lets UV rays through
- Leaving prints in a sunny window for "just a few days"
- Storing prints in damp basements or humid bathrooms
- Handling prints with bare, oily fingers
Each of these habits is easy to fix. Swapping one supply or moving one frame can add years to a print's life.
Maintenance: Checking Your Prints Over Time
Protecting prints is not a one-time job. A simple yearly check helps you catch problems early, when they are easier to correct.
Once a year, look at each print in good light. Check for yellowing, color shifts, spots, or curling edges. Open storage boxes and feel for any moisture or musty smell. Check frames for condensation or loose seals, and replace any sleeves that look worn or brittle.
Keep a short written log of when you last checked each print and what you found. This record helps you notice slow changes over years. If you see significant fading, move the print to a safer spot right away and consider having it reproduced from the original file, which many studios keep on record.
Preserving Your Senior Portraits for Generations
Your senior portraits deserve the same care you would give a family heirloom. The steps above protect the print itself. For a lasting result, many families choose handcrafted archival prints made to hold their color for decades. Proper storage extends beyond the physical print, as the process of organizing family photos ensures that these visual legacies remain accessible and coherent for future generations.
Swartz Portraits offers museum-quality heirloom prints, albums, and wall art handcrafted in Italy by GraphiStudio, designed for long-term display and keeping. To see how the heirloom collections are ordered, read How to Order Custom Italian Heirloom Photography Prints.
Protecting a print starts the day it is made. Light, heat, humidity, and materials all shape how it ages. Control those four things, and your senior portraits can look as rich in twenty years as they do on the day you first see them.
Schedule your free in-home consultation.
Frequently Asked Questions
Does sunlight make printed photos fade faster?
Yes. Ultraviolet light is the main cause of fading in printed photographs, and direct sun through a window can change the color of a print within a few seasons. Keep prints out of direct sunlight, use UV-filtering glass on frames, and rotate displays periodically so no single print takes the full force of daylight. Prints in shaded rooms with indirect light will keep their color far longer than prints placed in a sunny hallway or on a south-facing wall.
Are archival sleeves safe for storing photo prints?
Archival sleeves are safe when they are made from acid-free, lignin-free materials and are labeled as photo-safe or archival. Polypropylene and polyester sleeves are widely used because they do not off-gas chemicals that can harm prints. Avoid soft plastic sleeves, rubber bands, and paper envelopes that are not acid-free, since these can stain or degrade a print over time. Store sleeved prints upright in a sturdy box so they do not bend.
Is it safe to store photos in ziploc bags?
Standard zip-top bags are not a good long-term choice for photo prints. Many plastics trap moisture and can release compounds that cause prints to discolor, and the seal can hold humidity against the paper. If you use bags for short-term protection, choose polyethylene or polypropylene bags that are labeled photo-safe, keep them dry, and move prints into archival sleeves and a proper box as soon as possible.
How often should stored photo prints be checked?
Check stored prints at least once a year, and more often if they are kept in a basement, attic, or any space that sees humidity swings. Look for curling, yellowing, sticking between sheets, mold spots, or a faint smell of mildew. Take prints out gently, handle them by the edges with clean, dry hands, and return them to fresh archival materials if you notice any change. Early catches make restoration simpler and protect the rest of the collection.