 how-to
Senior Portrait Styling Tips for Guys
Table of Contents
- Senior Portrait Styling Tips for Guys Start With Your Personal Style
- Senior Picture Outfit Ideas for Guys Across Different Settings
- What Colors to Wear for Senior Pictures
- Fit, Comfort, and Camera-Ready Clothing Details
- Senior Portrait Poses for Guys That Show Confidence
- Grooming and Hair for Your Session
- Planning Multiple Outfits and Session Preparation Timeline
- Frequently Asked Questions
Last Updated: October 7, 2026
Senior Portrait Styling Tips for Guys Start With Your Personal Style
Your look in senior portraits should feel like you. Not a costume. What actually represents who you are right now.
Most high school senior portrait styling tips for guys stop at poses and neutral colors, then leave you guessing.
At Swartz Portraits, we have spent 40 years photographing high school seniors. The strongest sessions happen when the student owns their choices. You are not performing someone else's idea of what a senior should look like.
Start with one question: If my best friend had to describe my style in three words, what would they say? Casual? Sharp? Eclectic? Minimalist? Write those words down. Everything builds from there.
Your personal style is the foundation. A tailored look feels forced if you live in hoodies and jeans. Streetwear falls flat if you're naturally preppy. The camera picks up on authenticity and discomfort alike.
Senior Picture Outfit Ideas for Guys Across Different Settings
Where you're photographed changes what works. A formal blazer reads differently at an urban warehouse than in a botanical garden. Styling is the conversation between you, your outfit, and the environment.
Urban and Modern Looks
Urban settings like Market Street or warehouse backdrops call for cleaner lines and contemporary pieces. Think fitted jeans, structured jackets, and intentional layering. The background is industrial or architectural, so your clothing should feel equally deliberate.
A solid-colored button-up under a lightweight overshirt works well. Pair it with well-fitted dark jeans and clean sneakers or boots. Proportion is everything. Too loose reads sloppy. Too tight reads uncomfortable.
Streetwear works if it's part of who you are. A quality hoodie, tailored joggers, and minimal accessories create a cohesive modern look. Avoid oversized graphic tees with large logos unless that's genuinely your style. Small, subtle branding reads better than bold graphics.
Layering adds visual interest. A long-sleeve tee under a short-sleeve shirt, or a fitted jacket over a clean tee, creates depth. Urban backdrops are already busy, so your styling should be intentional without competing.
Classic and Timeless Options
Classic styling never dates. A well-fitted button-up in white, light blue, or neutral tones works across any background. Pair it with dark jeans or chinos. Add a sweater or cardigan for layered depth.
Solid colors are your friend. A crisp white shirt against a natural background is timeless. Light blue works almost everywhere. Neutrals like tan, gray, and olive are forgiving and photograph well.
A blazer elevates the look without feeling costume-like if the fit is right. It should skim your body, not hang loose. Pair it with jeans for smart-casual balance. Avoid oversized blazers that drown your frame.
Knitwear adds texture. A crew-neck sweater or lightweight cardigan in neutral tones creates visual interest while keeping the look refined. Texture reads well in photographs and adds dimension that solid colors alone cannot achieve.
Casual and Relaxed Wear
Casual doesn't mean sloppy. It means comfortable pieces that fit well and reflect how you actually dress. A well-fitted henley or long-sleeve tee in a solid color works everywhere. Pair it with jeans that fit properly, not baggy or overly tapered.
Texture matters here too. A linen shirt, a waffle-knit henley, or a cotton sweater adds visual interest without looking formal. These pieces photograph better than thin, flat fabrics.
Layering works for casual looks. A t-shirt under a lightweight jacket, or a long-sleeve tee under a short-sleeve overshirt, creates dimension. The layering should look natural, like something you'd actually wear.
Accessories keep casual looks intentional. A simple watch, a chain necklace, or a beanie can anchor the look. Keep accessories minimal and meaningful. One or two pieces, not five.
What Colors to Wear for Senior Pictures
Color is the fastest way to make a portrait look intentional or accidental. The right color makes your skin look healthy, separates you from the background, and holds up in whatever light the location gives you. Most styling guides stop at "wear solid colors." That is the starting line, not the finish.
Start With Your Skin Tone
Skin tone is the anchor. Everything else coordinates around it.
Warm undertones (golden, peachy, or olive) flatter warm colors. Olive, rust, camel, warm brown, cream, and forest green sit naturally against warm skin. Deep navy and burgundy also work because they carry warmth without competing.
Cool undertones (pink, red, or bluish) lean toward cool depth. Charcoal, slate blue, true white, cool gray, and deep plum read clean against cool skin. Black works well here too, especially against lighter backgrounds.
If you're not sure which camp you fall into, look at the veins on the inside of your wrist in natural daylight. Greenish veins usually point to warm undertones.
This is not a rigid rule. It is a starting filter. A warm-toned guy can wear charcoal and look sharp. A cool-toned guy can wear olive and look great.
Match Color to Background, Not Just to You
The background is half the photograph. Your outfit has to work with it, not against it.
Against natural backdrops like Mercer Botanic Gardens or Lake Conroe, greens, browns, and stone tones can flatten you if you wear the exact same shade. The fix is contrast. A cream or white shirt against deep green foliage pops.
Against urban and architectural backdrops like Market Street or a warehouse wall, the background is often gray, tan, brick, or glass. Warm tones like rust, camel, and olive cut through cool concrete. Cool tones like slate and charcoal hold their own against brick.
Against a simple studio backdrop, you have the most freedom. Light backgrounds pair well with mid-to-dark outfits. Dark backgrounds pair well with lighter outfits. The goal is separation.
Think About the Light
Light changes color. This is the part most guides skip.
Golden hour light, the hour after sunrise and before sunset, pushes everything warm. Whites turn creamy. Blues turn slightly green. Warm tones and neutrals hold up best in that window. Pure white can look yellow in the final image.
Midday sun is harsh and cool. It washes out pale colors and deepens dark ones. Mid-tones like olive, slate, and burgundy survive midday light better than extremes.
Overcast light is soft and even. It is the most forgiving light for color. Almost anything reads true, which is why overcast days are a quiet advantage for outdoor sessions.
If you're shooting in multiple locations with different light, bring one outfit that works in every condition. A mid-tone solid in olive, slate, or navy is the safest bet.
Patterns, Logos, and the Rules That Actually Matter
Solid colors photograph better than patterns. Patterns create visual noise that competes with your face for the viewer's attention. Fine stripes, small checks, and subtle textures are usually fine. Bold plaid, large graphics, and busy prints are not.
Logos are a separate issue. A small, subtle logo is fine. A large graphic tee with a brand name across the chest turns your portrait into an advertisement. Unless the brand is genuinely part of your identity, leave it out.
If you love pattern, use it in a second outfit where the pattern is the point, not the background noise. A flannel over a solid tee works. A patterned button-up alone usually does not.
Build a Palette, Not a Single Shirt
Instead of picking one shirt, build a small palette for your session. Choose two or three colors that work together and with your skin tone. For example: cream, olive, and charcoal. Or white, navy, and rust. Then build each outfit from that palette.
This guarantees your outfits look cohesive across the gallery instead of random, and it makes packing simple because every piece already works with the others.
A palette also solves the background problem. If you know your locations in advance, you can choose colors that contrast with each one. That is a conversation worth having during your consultation, when you can walk through locations and light together.
Fit, Comfort, and Camera-Ready Clothing Details
How your clothes fit matters more than the brand or price tag.
Shoulders should sit at your actual shoulder line, not drooping down your arms or pulling tight.
Jeans should fit your waist without bunching or gapping. They should sit at your natural waist, not low on your hips.
Comfort is non-negotiable. You will be moving, changing positions, and spending time in front of the camera.
Avoid wrinkles. Iron or steam your clothes before the session. Wrinkles read in photographs and distract from your face. If a piece wrinkles easily, consider something else.
Avoid tags and visible seams. Make sure nothing is sticking out or visible that should not be. Tuck in shirts if they are meant to be tucked.
Check for pilling, stains, or wear. Clothes that look worn-out in person look worse in photographs. Choose pieces that look fresh and well-maintained.
Senior Portrait Poses for Guys That Show Confidence
Posing is about more than where you put your hands. It is about how you carry yourself. Confidence reads in photographs. Tension does too. The goal is to look relaxed and present, not stiff or awkward.
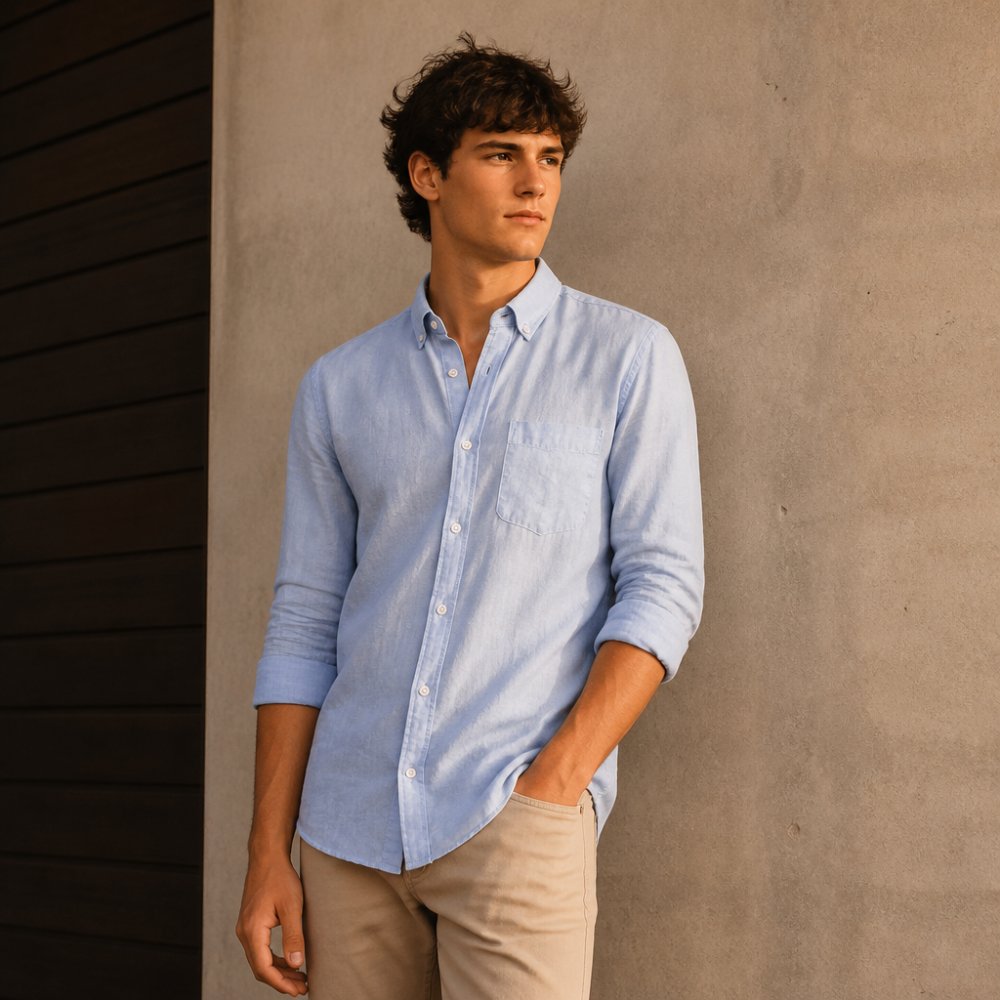
Standing Poses and Hand Placement
Standing poses are the foundation of senior portraits. Avoid standing directly at the camera with your arms at your sides. That reads stiff and unnatural.
Hand placement matters. Putting both hands in your pockets looks defensive. Leaving both arms at your sides looks awkward.
Avoid crossing your arms tightly across your chest. It reads closed off. If you cross your arms, do it loosely, more like you are thinking than defensive.
Hands in your hair can work if it feels natural. Resting your hand on the back of your neck or running your hand through your hair adds movement and looks relaxed.
Lean into your posture. Stand up straight without looking rigid. Your shoulders should be relaxed, not hunched. A slight forward lean toward the camera creates engagement without looking strained.
Leaning and Angled Positions
Leaning against a wall, fence, or tree creates a relaxed pose that works well. Lean with one shoulder, not both. Cross one leg in front of the other. This creates an angled, natural look rather than a stiff, head-on stance.
Leaning against a wall works best when you are not directly facing the camera. Turn your body slightly so your shoulder is closer to the camera than your hip. This creates dimension and looks more dynamic.
Sitting poses work too, though they are less common for senior guy portraits. If you sit, sit forward slightly on a bench or chair. Avoid sinking back into the seat.
Angled positions photograph better than head-on stances. Turn your body 45 degrees to the camera. Look back toward the camera or slightly off to the side. This creates a more flattering angle and looks more intentional.
Facial Expression and Natural Confidence
Your face matters more than your pose. A great pose with a tense expression reads wrong. A simple pose with a genuine expression reads right.
Avoid a wide, forced smile. It looks unnatural in photographs. Instead, think of something that makes you slightly happy.
Neutral expressions work too. You do not have to smile in every shot. A calm, present expression can be more powerful than a smile.
Look slightly off-camera rather than directly at the lens. This creates a more natural, editorial feel.
Avoid looking down unless it is intentional. Looking down reads uncertain. Keep your chin level or slightly up. Tilting your chin down too much creates unflattering shadows under the jaw.
Relax your face. Tension in your jaw or forehead shows in photographs. Take a breath. Let your shoulders drop. Think of something that makes you feel calm and present.
Grooming and Hair for Your Session
Hair and grooming matter. They are part of your overall look.
Get a haircut 5 to 7 days before your session. This gives your hair time to settle after the cut.
Style your hair the way you normally do. Do not try a new hairstyle for the first time on session day. Stick with what you know works.
Facial hair should be intentional. If you shave, shave the morning of your session so you look clean and fresh.
Skin should be clean. Wash your face the morning of your session. Avoid heavy makeup unless that is part of your style.
Eyebrows matter. Clean, groomed eyebrows frame your face. You do not need anything dramatic. Just make sure they are not overgrown or unkempt.
Avoid sunburn or heavy tanning. Sunburned skin looks uncomfortable and photographs with unnatural color.
Planning Multiple Outfits and Session Preparation Timeline
Unlimited outfit changes are only useful if the outfits are planned. Bring five shirts that all look the same and you get five versions of the same portrait. Bring three outfits that each say something different and you get a gallery with range.
The goal is variety across four axes: color, formality, texture, and setting. Plan for at least three of the four to change between outfits.
Build Outfits Around Contrast, Not Volume
Three well-chosen outfits beat six random ones. Here is a framework that works.
Outfit one: the classic. A button-up or clean knit in a solid mid-tone. Dark jeans or chinos. This is the safe, timeless look that works in almost any location and any light.
Outfit two: the casual. A henley, quality tee, or flannel over a solid base. Jeans that fit well. This is the outfit that feels like you on a normal day.
Outfit three: the personal. This is where you show a specific part of who you are. A team jacket if you are an athlete. A vintage piece if you thrift.
Now check the contrast. If outfit one is a light button-up with dark jeans, outfit two should not be another light shirt with dark jeans. Change the color, the formality, or the silhouette.
Coordinate Outfits With Locations
Each location has a mood. Match the outfit to the mood, not the other way around.
Urban and architectural settings like Market Street or a warehouse wall call for cleaner lines and more structure. Fitted jeans, a structured jacket, intentional layering.
Natural settings like Mercer Botanic Gardens or Lake Conroe call for softer, more relaxed pieces. Linen, cotton, knitwear. Earth tones and mid-tones read well against foliage and water. Avoid busy patterns that fight the texture of the environment.
Waterfront and open-air settings like The Woodlands Waterway or Towne Lake work with almost anything, but wind is a factor. Loose fabrics move.
If you are shooting in multiple locations, plan the outfit order around the route. Start with the most formal look and work toward the most casual, or the reverse.
Fit, Fabric, and the Details That Show Up on Camera
Fit matters more than brand. A well-fitted shirt from a department store photographs better than a designer piece that pulls at the shoulders.
Shoulders should sit at your actual shoulder line. Sleeves should end at the wrist when your arm is relaxed. Shirts should not be so long that they bunch at the hip.
Fabric matters too. Thin, flat fabrics show every wrinkle and every fold. Mid-weight cotton, linen blends, waffle knits, and structured knits hold their shape and add texture that reads well in photographs.
Check for pocket bulk. A phone, wallet, or keys in a pocket creates a visible lump. Empty your pockets before you step in front of the camera.
Iron or steam everything before you pack it. Wrinkles read in photographs and pull attention away from your face.
Accessories: One or Two, Not Five
Accessories anchor a look when they are used sparingly. A simple watch, a chain necklace, a beanie, or a pair of clean boots can pull an outfit together. Two accessories is usually the ceiling. Three starts to look like a costume.
Make sure accessories match the outfit. A beanie does not belong with a blazer. A dress watch does not belong with joggers. Each piece should feel like it belongs to the same story.
Session Preparation Timeline
| Timeframe | Task |
|---|---|
| 2 to 3 weeks before | Schedule consultation, discuss styling, locations, and light |
| 1 week before | Get haircut, finalize outfit choices, confirm locations |
| 3 to 5 days before | Iron or steam all outfits, check fit and condition, gather accessories |
| Day before | Pack outfits in a garment bag, check weather, confirm arrival time |
| Morning of session | Shower, groom, eat a light meal, arrive early to settle in |
Day-Of Details That Make a Difference
Arrive early. Ten to fifteen minutes gives you time to settle, look at the light, and shake off nerves before the first frame. Rushing into a session shows in the first few portraits.
Bring water and a light snack. Sessions can run several hours with movement between locations. You will feel better and look better if you are not running on empty.
Eat light before the session. A heavy meal an hour before will make you sluggish. Caffeine is fine if it does not make you jittery. If it does, skip it.
Bring a backup option. If you are unsure about one outfit, bring a fourth piece as a safety net.
Bring a lint roller. Dark fabrics attract lint, and lint shows up in photographs. A quick pass before each outfit change takes ten seconds and saves a retouch.
Swartz Portraits photographs 100 seniors per year, with no more than 8 from any single high school. Schedule your free in-home consultation.
Frequently Asked Questions
What do guys wear for senior portraits?
Choose outfits that reflect your personal style and feel comfortable. Classic options include button-up shirts, solid-color sweaters, and well-fitting jeans. For a modern look, try layered pieces or textured fabrics. The key is selecting clothing that fits well, photographs clearly, and makes you feel confident. Solid colors and clean lines photograph better than busy patterns. Plan at least two outfit changes to give yourself variety in your final portraits.
How should I choose colors for senior pictures based on my skin tone and the background?
Warm skin tones typically look best in earth tones, warm grays, and rich jewel tones like burgundy or forest green. Cool skin tones suit navy, cool grays, and jewel tones like emerald or sapphire. Avoid colors that match your background. If you're shooting in urban settings with gray tones, wear warmer colors to stand out. Neutral backgrounds work well with nearly any color, giving you more flexibility. Discuss location choices during your consultation so you can coordinate colors that complement both you and your surroundings.
What are the best poses for senior portrait photos for guys?
Standing poses work well when you keep one shoulder slightly forward and avoid standing straight-on to the camera. Crossed-arm poses convey confidence but should feel natural, not stiff. Leaning against a wall or other surface adds relaxation to your posture. The most important element is your hands. Keep them purposeful: in pockets, crossed, or gently resting. A genuine expression matters more than any pose. Your Master Photographer will guide you through positions that feel natural and showcase your personality.
How far in advance should I plan my outfits and prepare for my session?
Plan your outfits at least two weeks before your session. Choose pieces that fit well and feel like you. Prepare your hair the day before by washing it so it has time to settle into its natural style. On session day, eat a light meal beforehand so you feel energized. Bring all your outfit changes ready to go. During your free in-home consultation, you can discuss your styling choices with your Master Photographer and get specific guidance for the locations you'll be shooting.